
This guide is aimed at your firm’s IT administration and describes setting up MSAL authentication in the Azure portal, so that DEPLAW can receive email via IMAP and send email via SMTP. For IMAP/SMTP, Microsoft now only supports authentication via MSAL (OAuth2) – classic sign-in with a username and password is no longer available.
The screenshots show the actual setup in the Azure portal of Legal Data Technology GmbH; the tenant ID, client ID, and other IDs have been redacted.
Background: MSAL and “on-behalf-of”
The Microsoft Authentication Library (MSAL) handles the OAuth2 process against the Microsoft authentication interface. DEPLAW uses the on-behalf-of flow for this: the backend acts as its own service, exchanges the user’s token for its own token from the Microsoft identity platform, and afterward mainly uses that token (cached in the database).
Access to IMAP/SMTP happens from the perspective of the signed-in person – only mailboxes that person has permissions for can be accessed.
Overview: two app registrations
In the Azure portal (available at https://portal.azure.com/), you create two enterprise applications (app registrations):
Accessing the app registrations
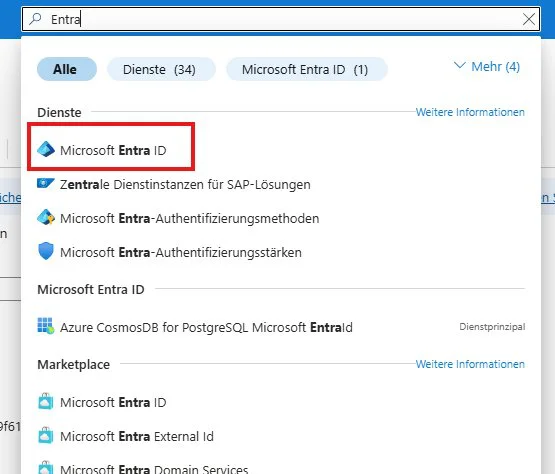
In the Azure portal, use the search to navigate to Microsoft Entra ID:
Then, under Manage → App registrations → New registration, create each application:
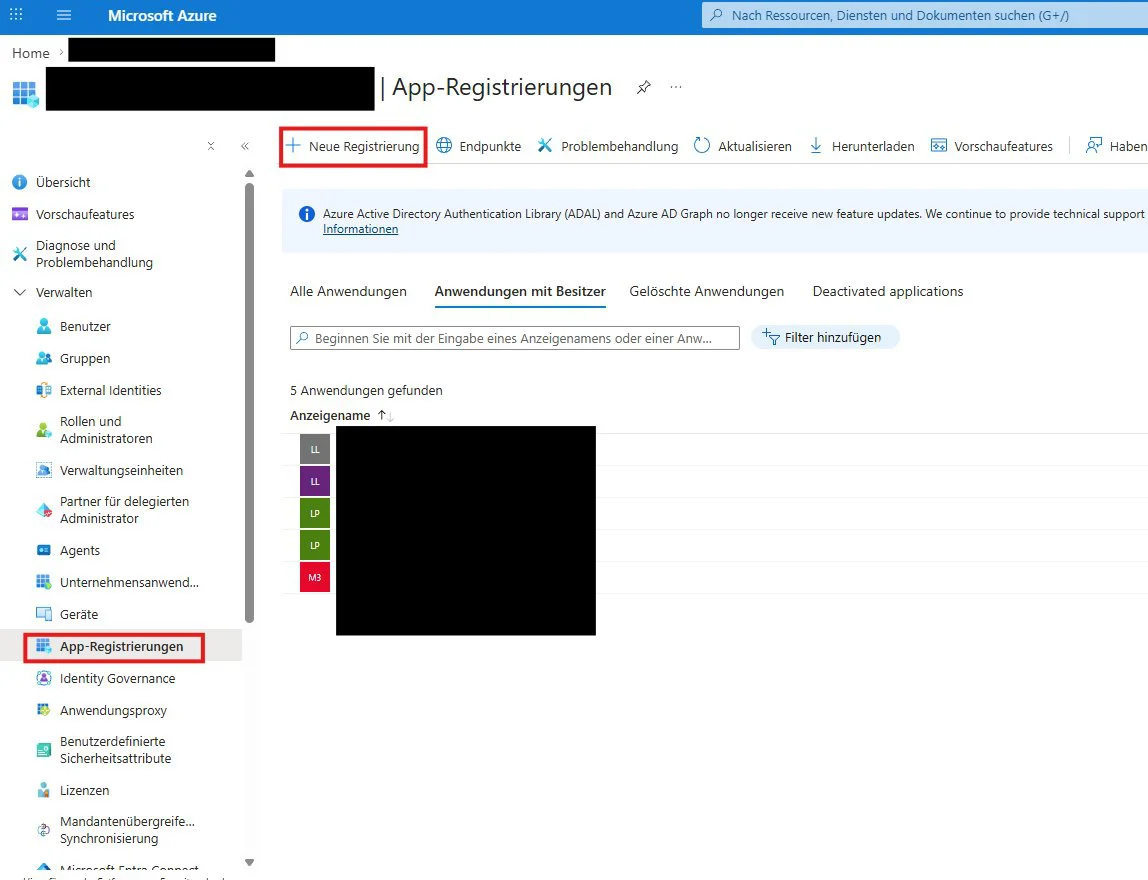
1. Application: DEPLAW MSAL Anmeldemaske
Registration
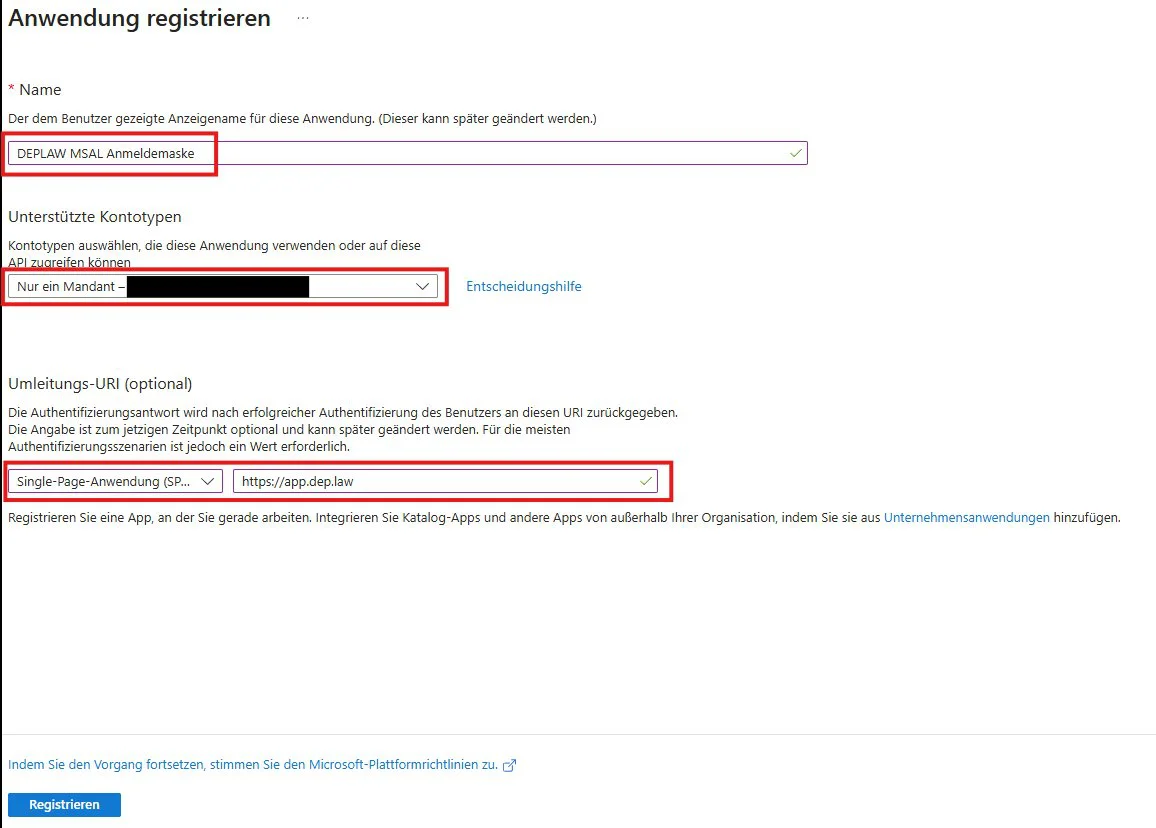
Set the following values when creating it:
| Field | Value |
|---|---|
| Name | DEPLAW MSAL Anmeldemaske |
| Supported account types | Single tenant |
| Redirect URI | Platform Single-page application (SPA), value https://app.dep.law |
Entering the data into the DEPLAW wizard
Once the first application is created, its data can already be entered into the DEPLAW wizard – under Settings → Communication → Microsoft Accounts → Microsoft Tenants → Add:
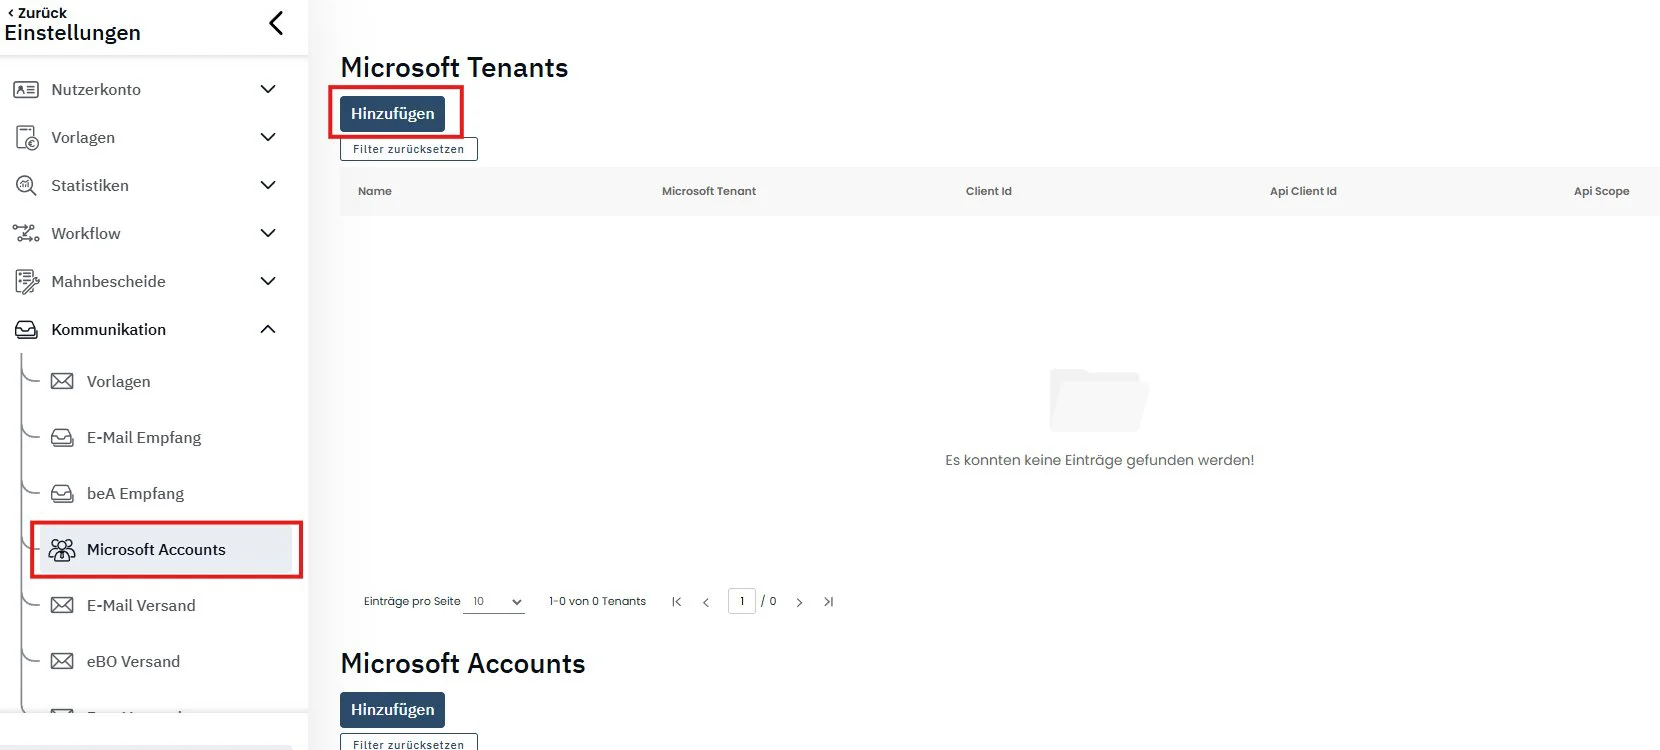
The required values are shown in the enterprise application’s overview:
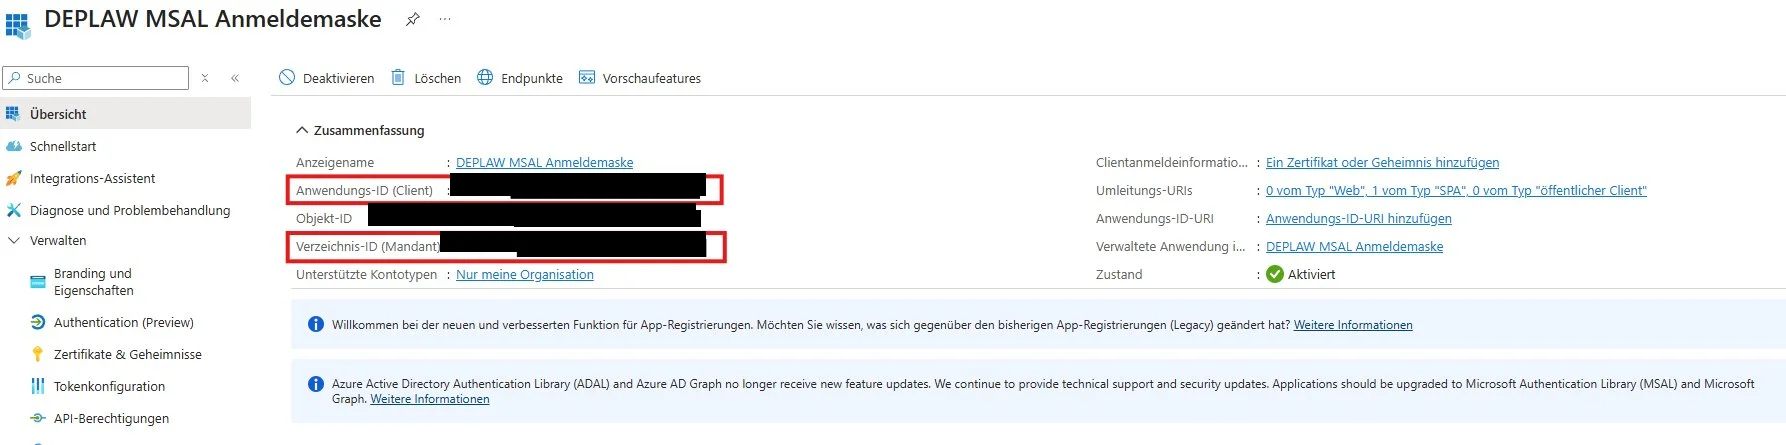
| Value | Source |
|---|---|
| Tenant | https://login.microsoftonline.com/{Directory (tenant) ID}/ |
| Client Id | corresponds to the application’s Application (client) ID |
Enter these values in the wizard step Client MSAL Infos:
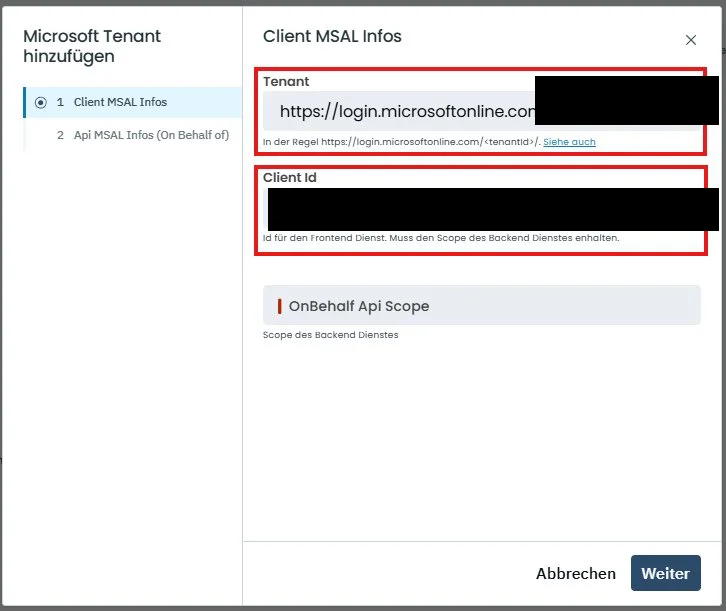
2. Application: DEPLAW Kommunikationsschnittstelle
This second application governs access to IMAP and SMTP.
Registration
| Field | Value |
|---|---|
| Name | DEPLAW Kommunikationsschnittstelle |
| Supported account types | Single tenant |
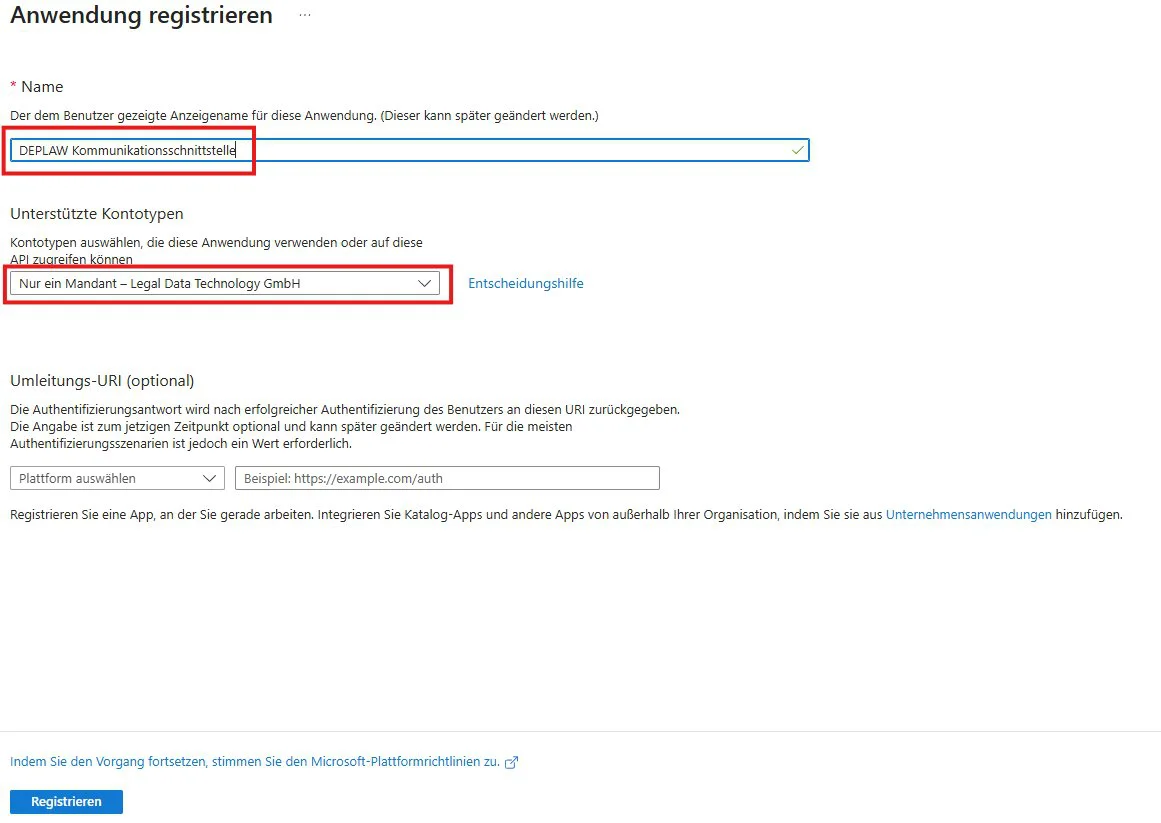
Setting API permissions
Under API permissions → Add a permission, configure the IMAP and SMTP permissions:
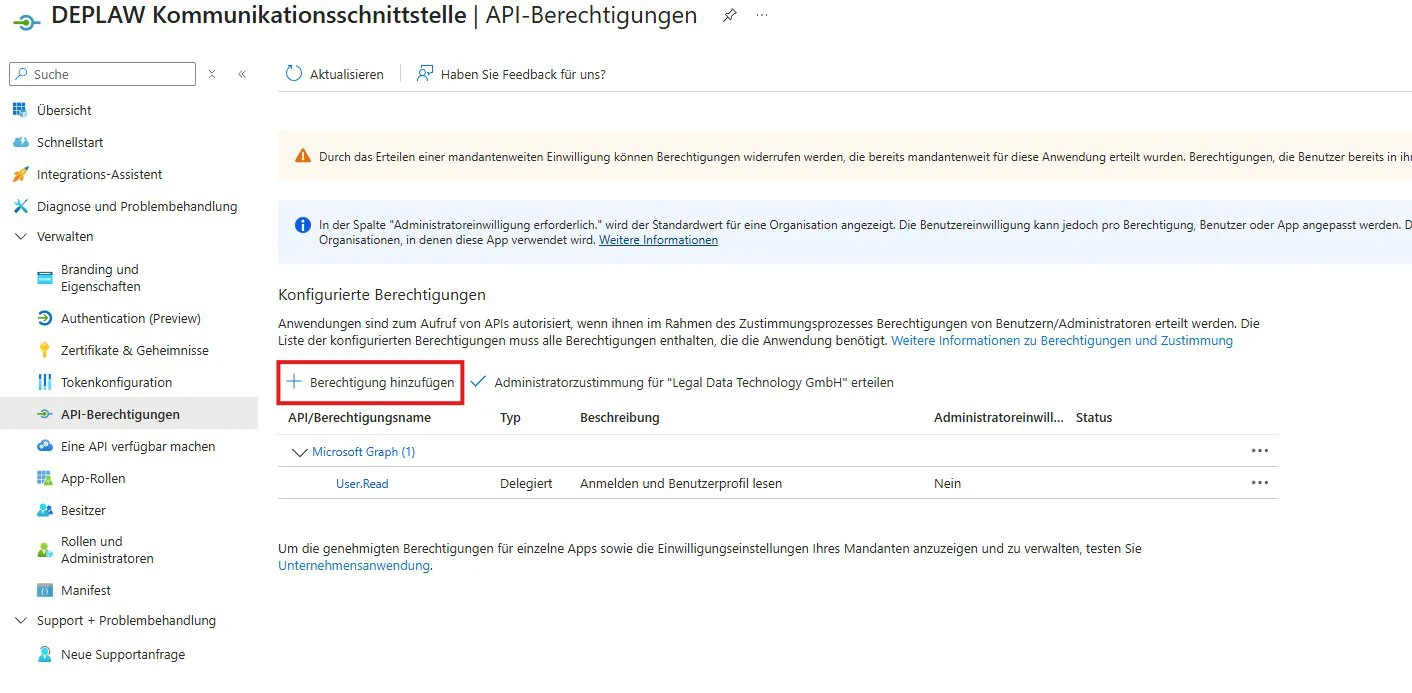
a) IMAP.AccessAsUser.All (Microsoft Graph) – select the Microsoft Graph API:
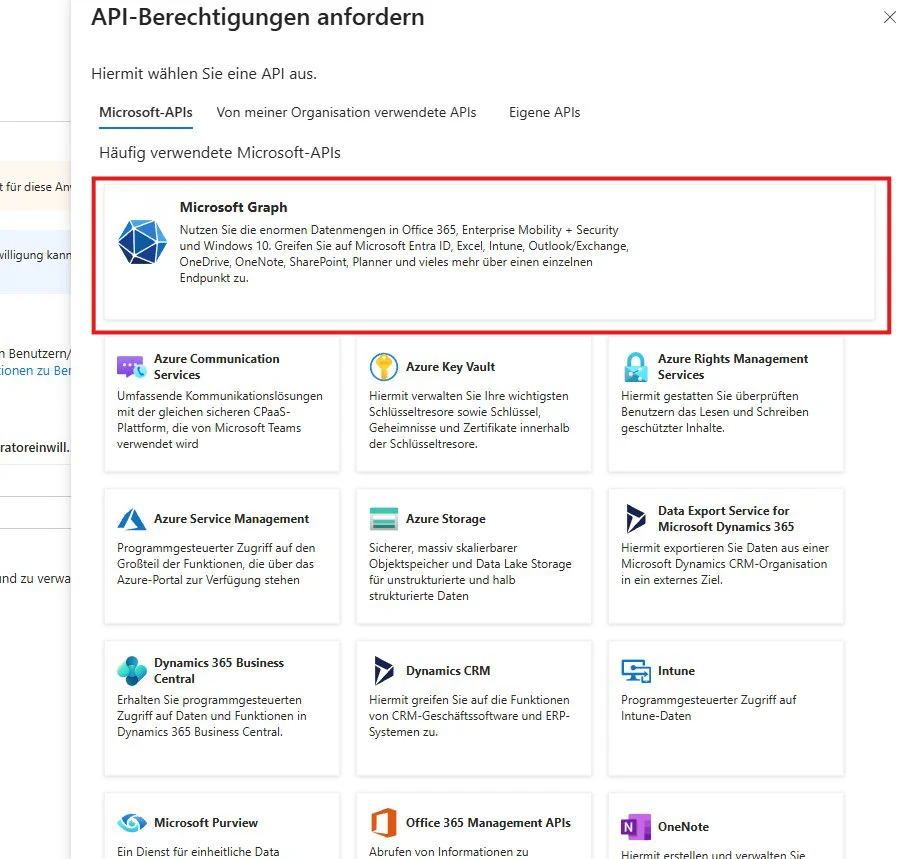
Choose type Delegated permissions, select and add the permission IMAP.AccessAsUser.All:
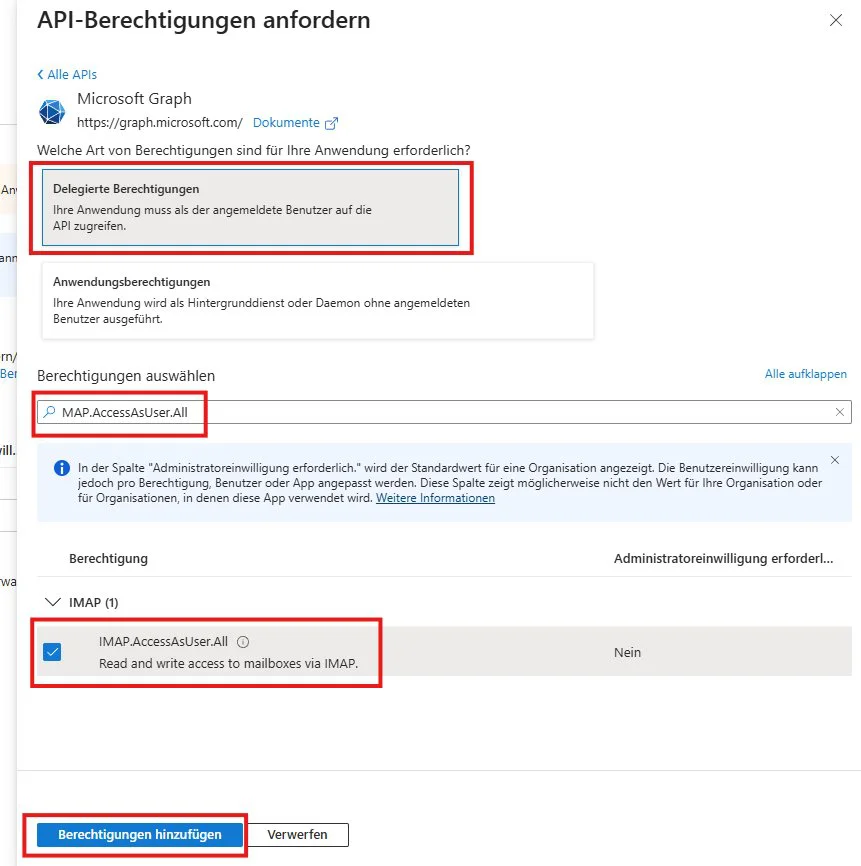
IMAP.AccessAsUser.All – read/write access to mailboxes via IMAP.b) Mail.Send (Microsoft Graph) – type Delegated permissions, select and add the permission Mail.Send:
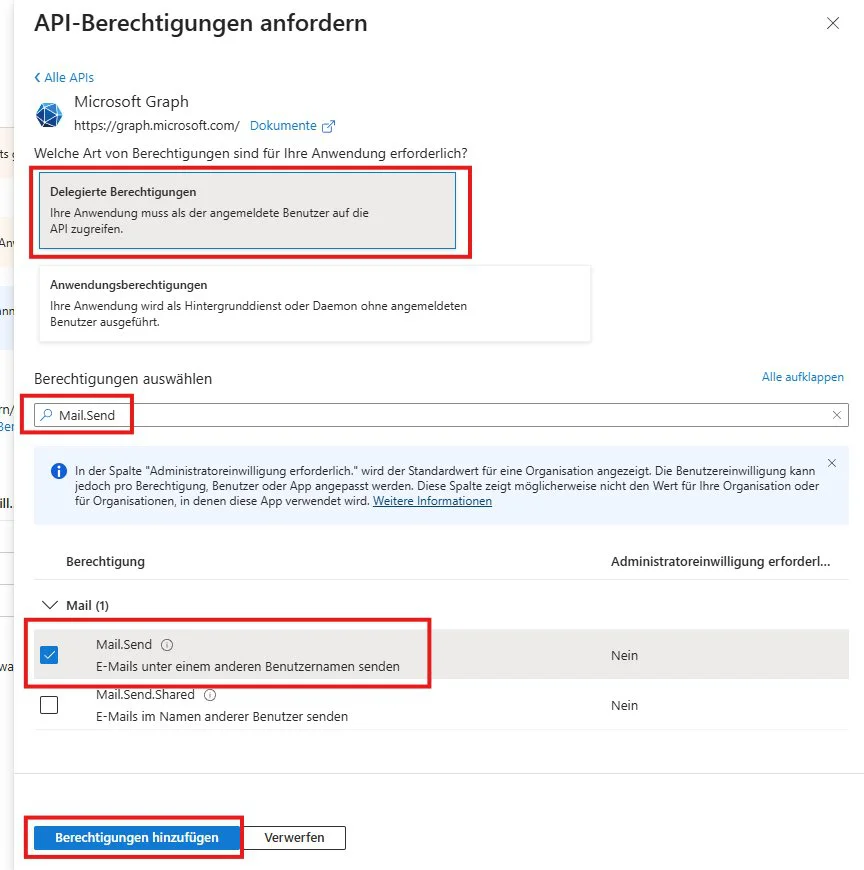
Mail.Send – send emails as the signed-in user.c) IMAP.AccessAsApp (Office 365 Exchange Online) – under the APIs my organization uses tab, filter for Office and select Office 365 Exchange Online:
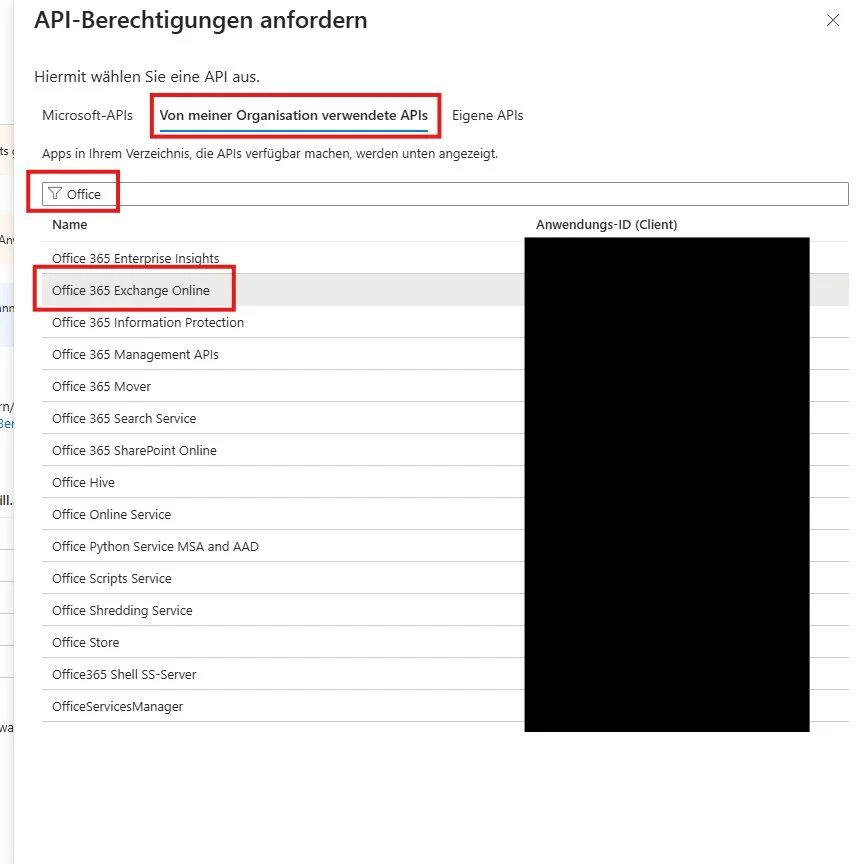
Choose type Application permissions, select and add the permission IMAP.AccessAsApp:
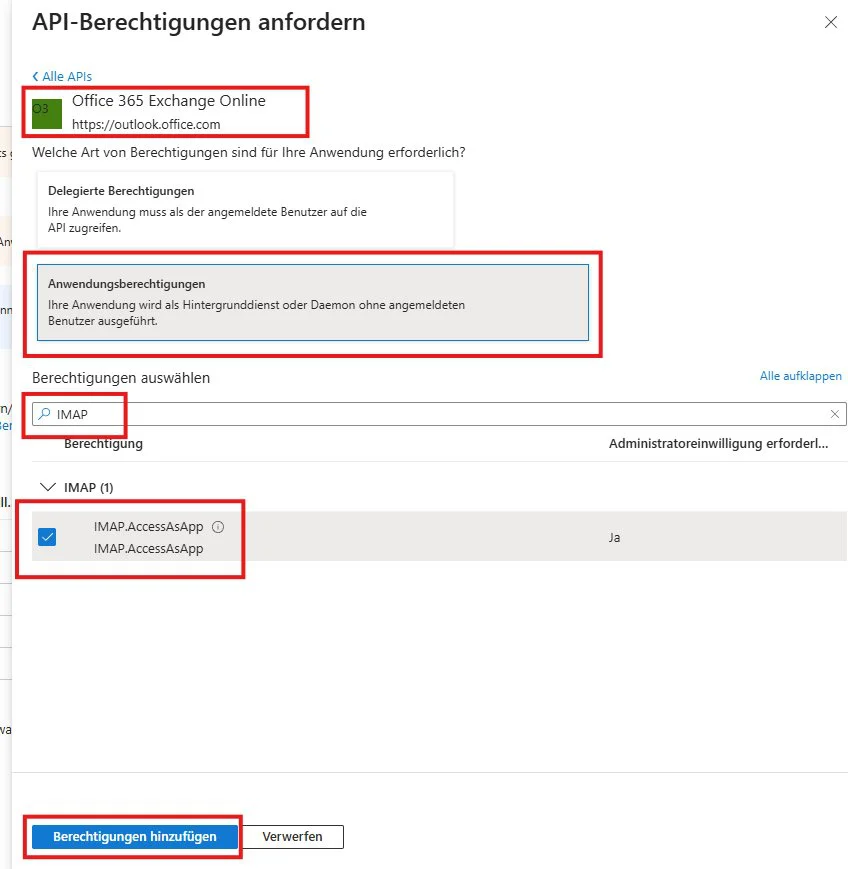
IMAP.AccessAsApp – requires admin consent.Granting admin consent
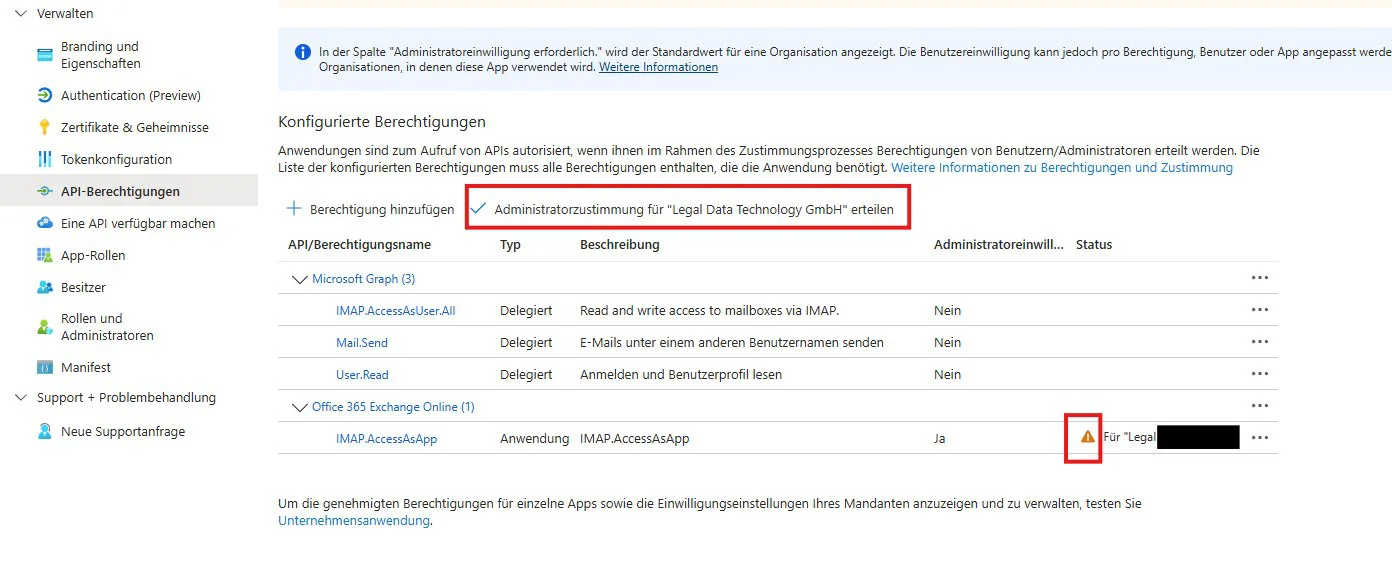
All permissions now appear in the overview. Use Grant admin consent for “…” to give consent (the application permission IMAP.AccessAsApp requires this):
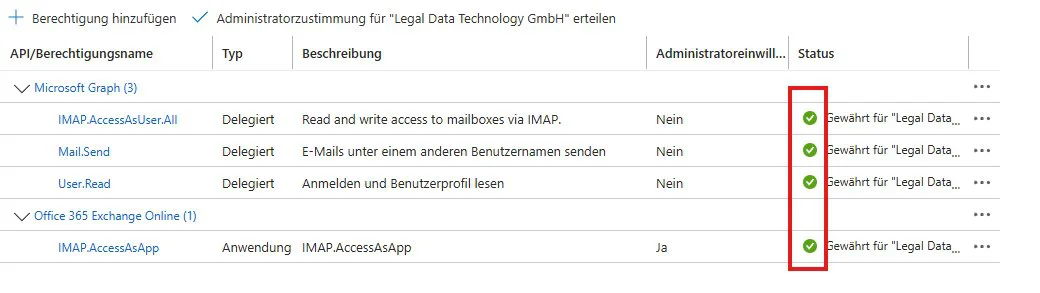
Afterwards, the status should be green on every row:
Exposing an API
Finally, under Expose an API, set the application ID URI (api://{Client ID}):
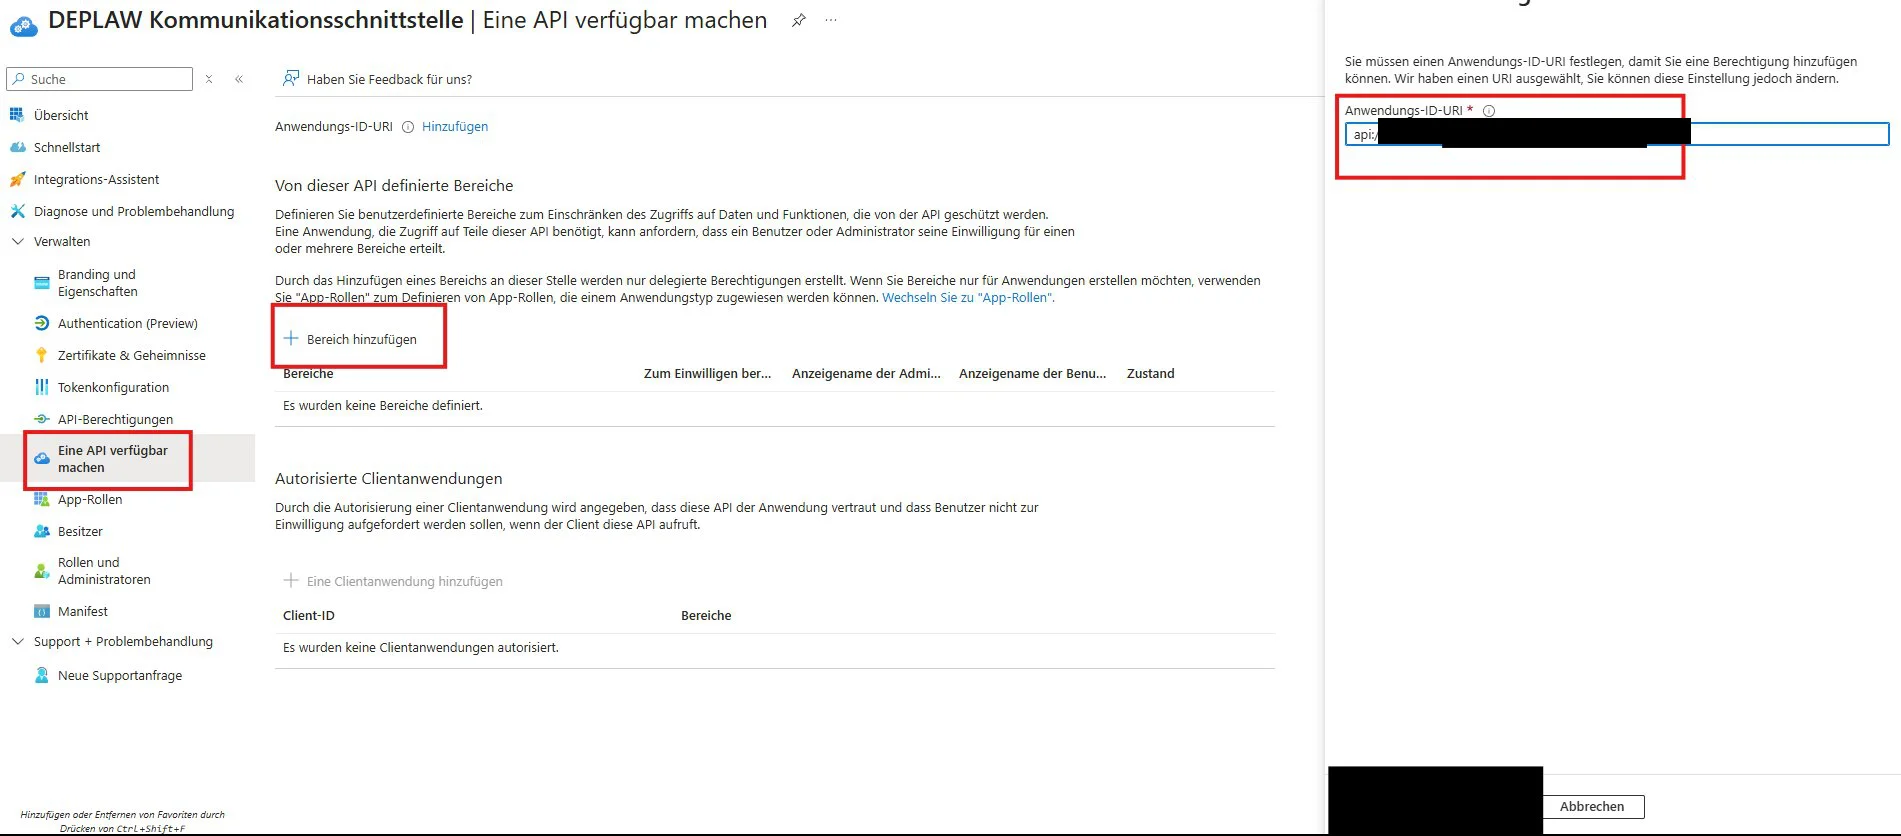
api://{Client ID}.Use Add a scope to create the scope:
| Field | Value |
|---|---|
| Scope name | deplaw.communications |
| Who can consent | Admins and users |
| Admin consent display name / description | DEPLAW Kommunikationsschnittstelle |
| State | Enabled |
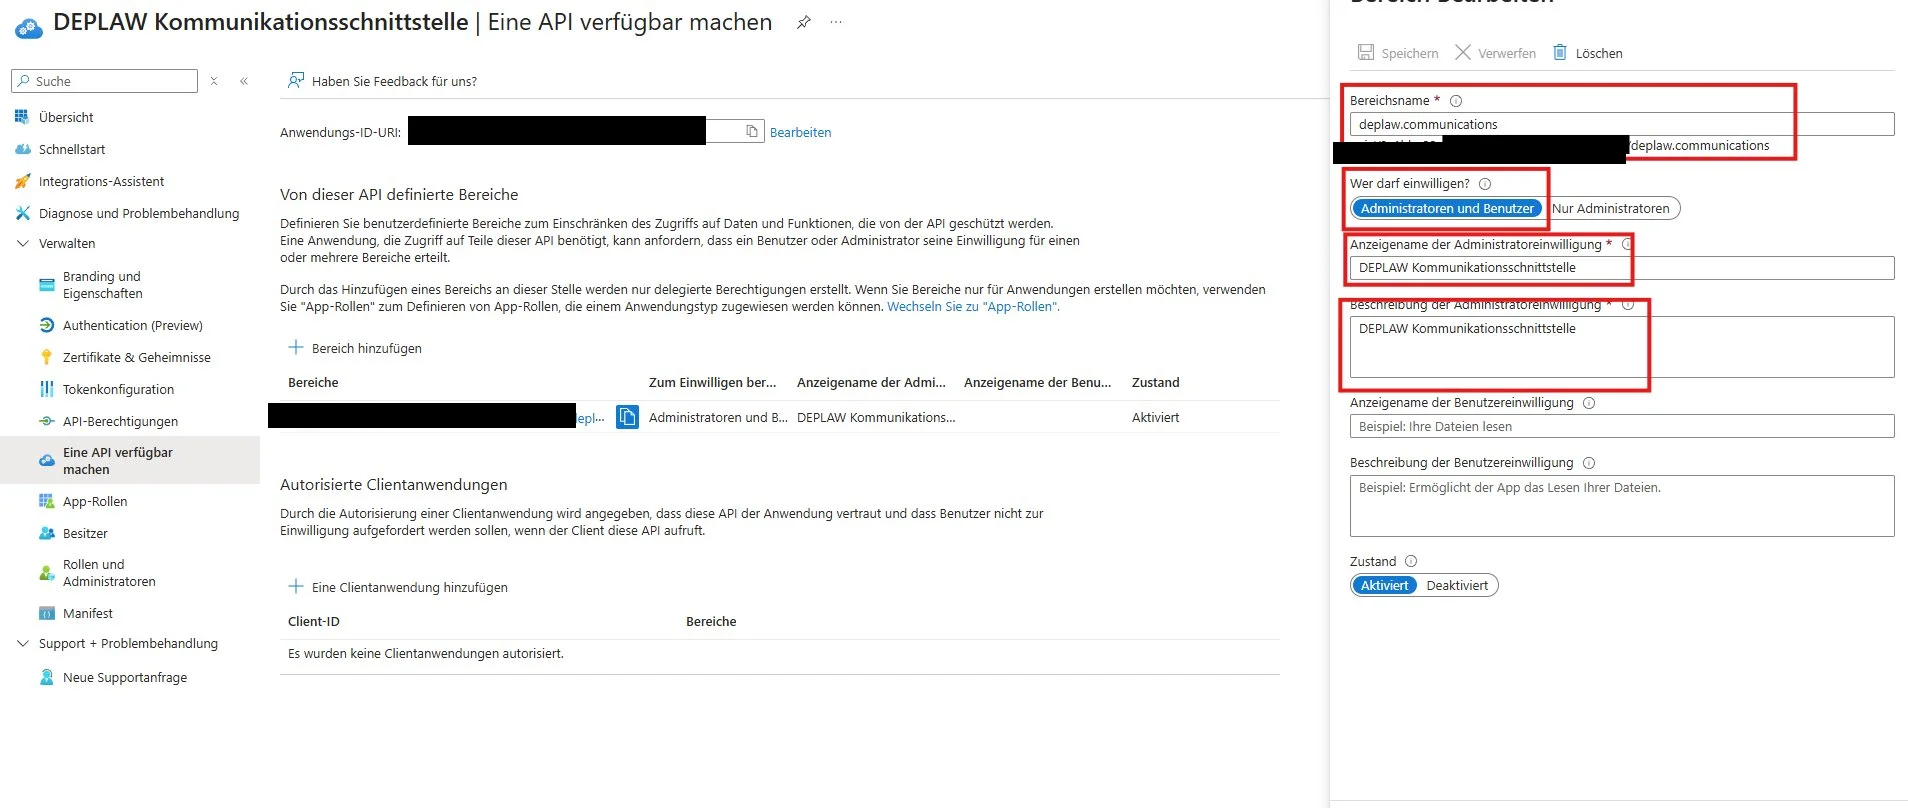
deplaw.communications with "Admins and users".The created scope then appears in the list:
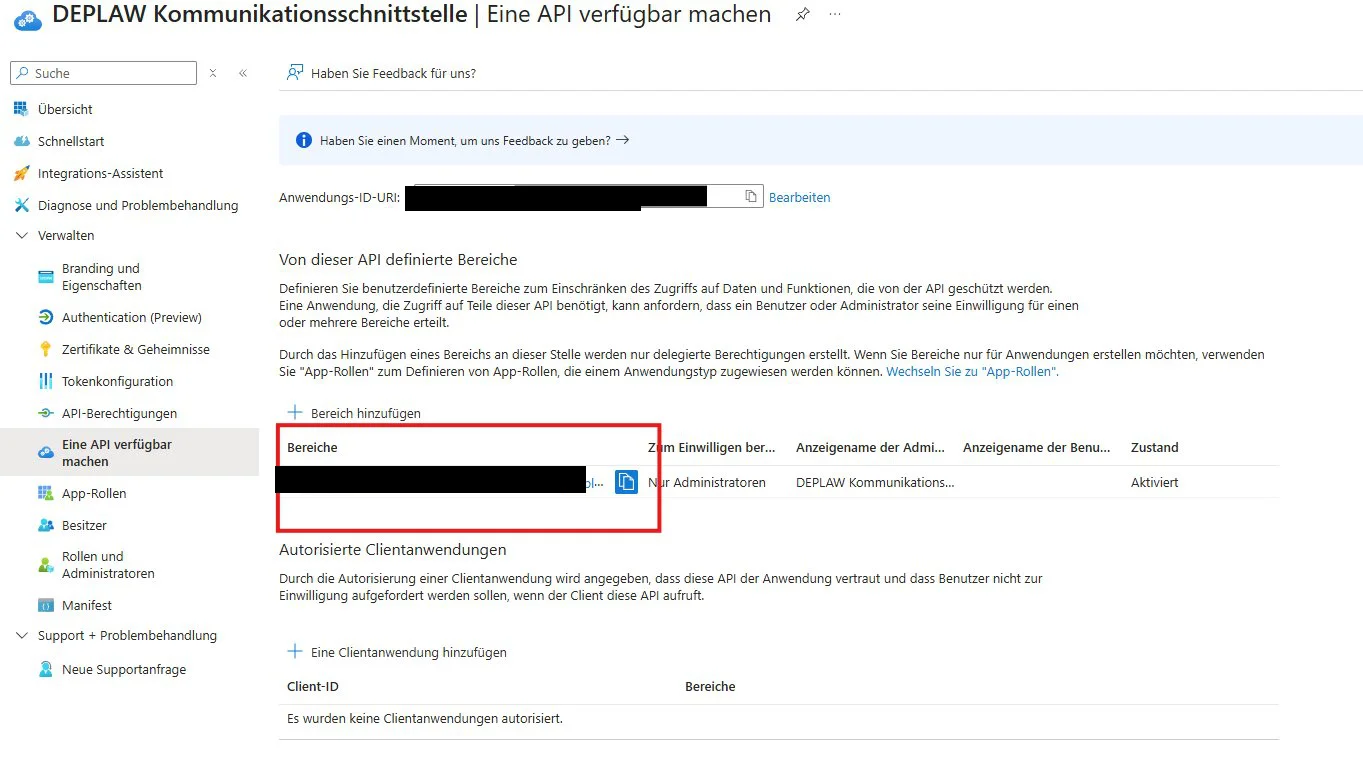
deplaw.communications is created and enabled.Entering the remaining data into the DEPLAW wizard
In the wizard step Client MSAL Infos (continuing from application 1), fill in the OnBehalf Api Scope field – it corresponds to the newly created API, e.g. api://3c1bbe23XXXX/deplaw.communications:
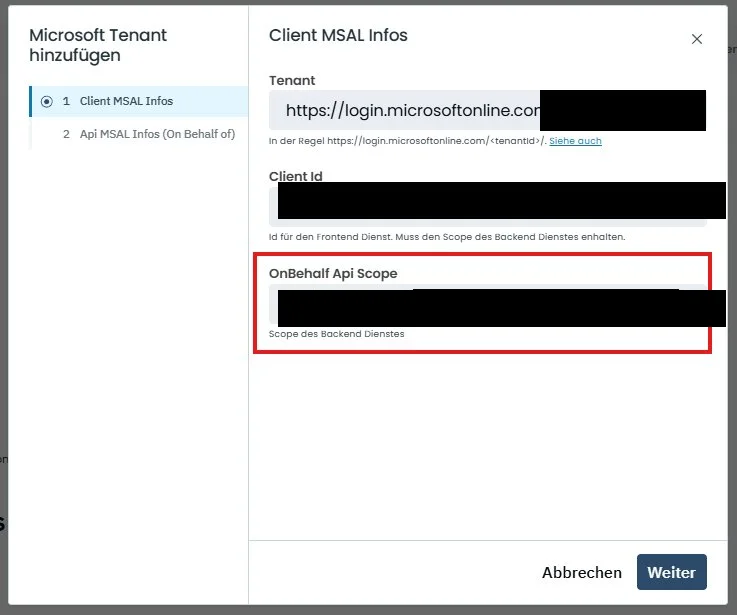
On the next wizard page, Api MSAL Infos (On Behalf of):
| Field | Value |
|---|---|
| Systemname | your choice |
| Api Client Id | corresponds to the Application (client) ID of the second application (DEPLAW Kommunikationsschnittstelle) |
The application (client) ID is shown in the second application’s overview:
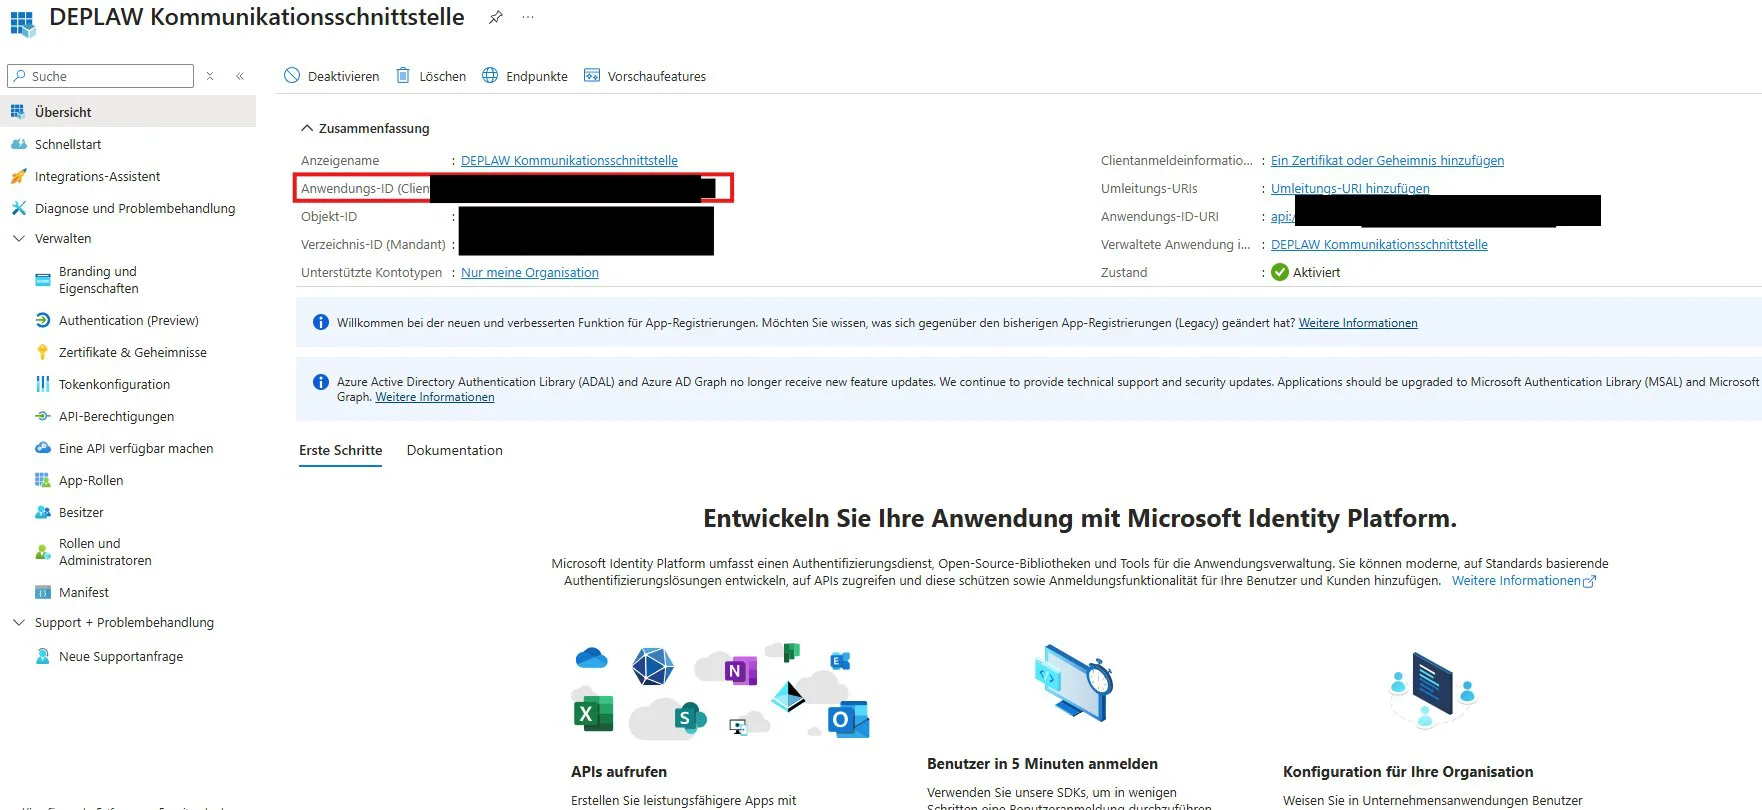
Creating a client secret
For the Api Client Secret (backend service secret), create a client secret in the DEPLAW Kommunikationsschnittstelle app: Certificates & secrets → Client secrets → New client secret.
| Field | Value |
|---|---|
| Description | e.g. DEPLAW |
| Expires | e.g. Recommended: 180 days (6 months) |
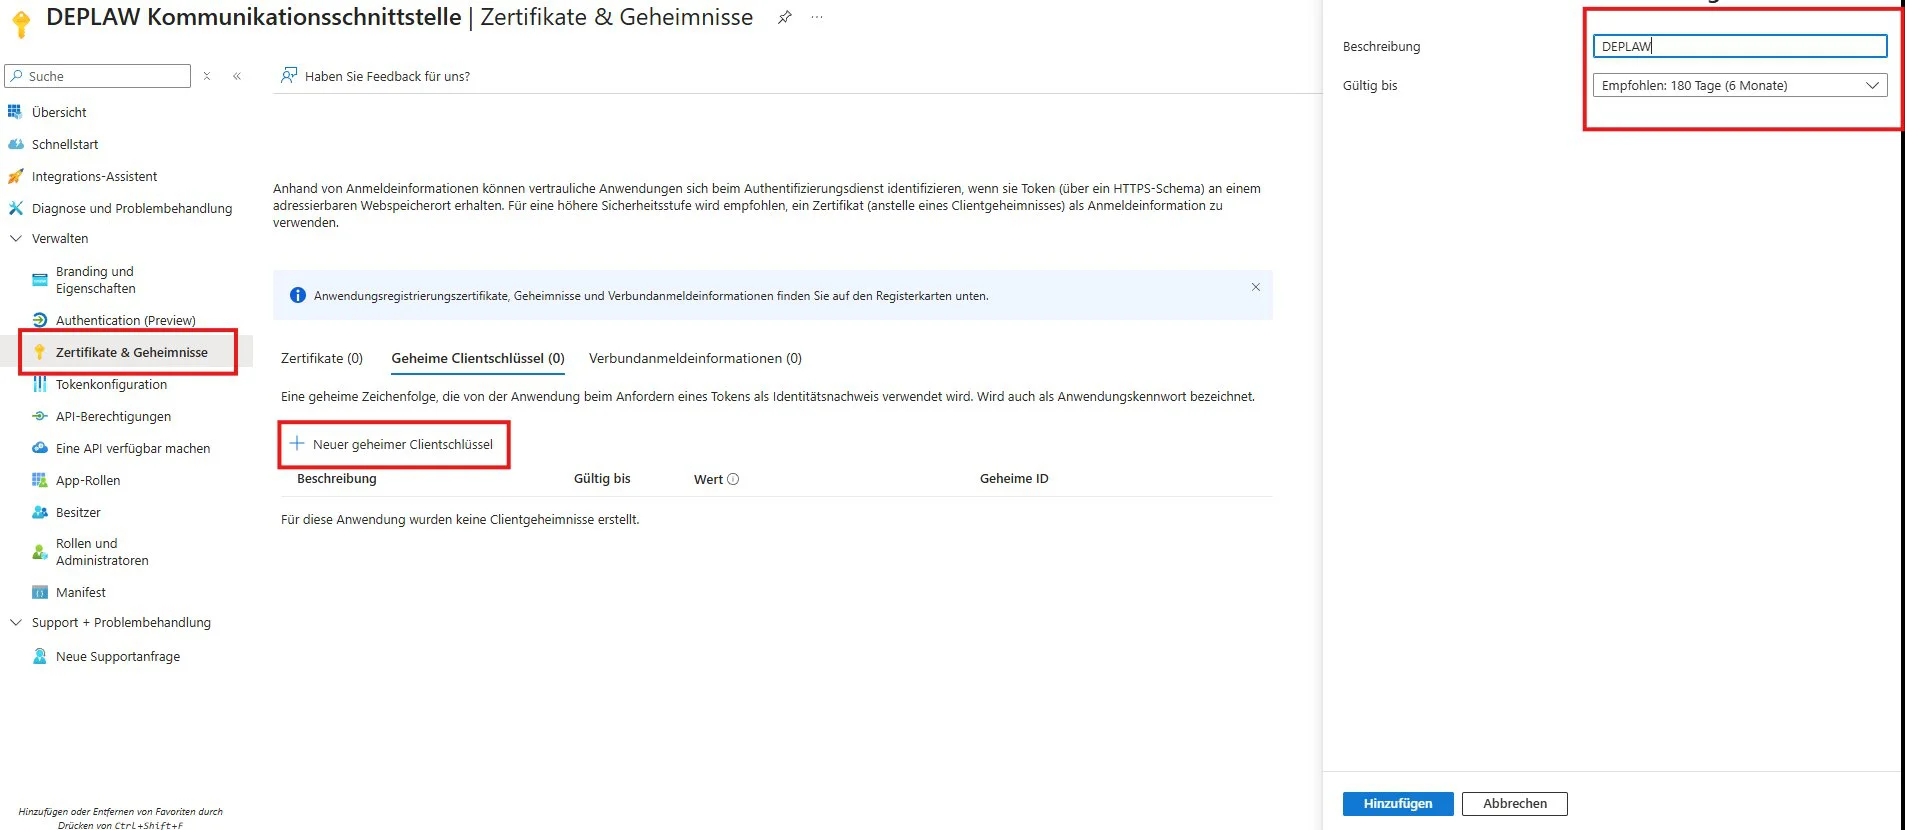
Completing the wizard
Enter the copied value as the Api Client Secret in the wizard step Api MSAL Infos (On Behalf of) and save via Finish:
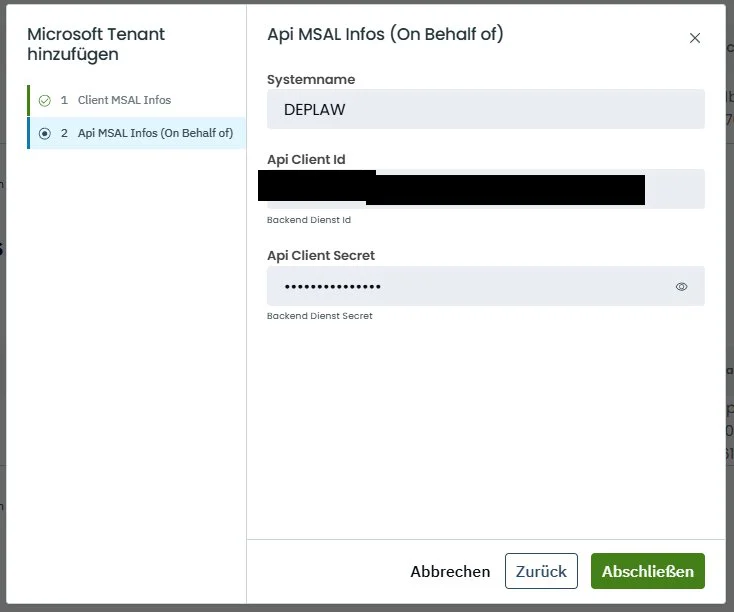
3. Adding the scope in the sign-in app as a permission
So that the frontend (the DEPLAW MSAL Anmeldemaske app) can request a token for the backend service in the on-behalf-of flow, the scope deplaw.communications of the DEPLAW Kommunikationsschnittstelle app must be added as an API permission in the sign-in app.
In the DEPLAW MSAL Anmeldemaske app, under API permissions → Add a permission → APIs my organization uses, filter for deplaw and select DEPLAW Kommunikationsschnittstelle:
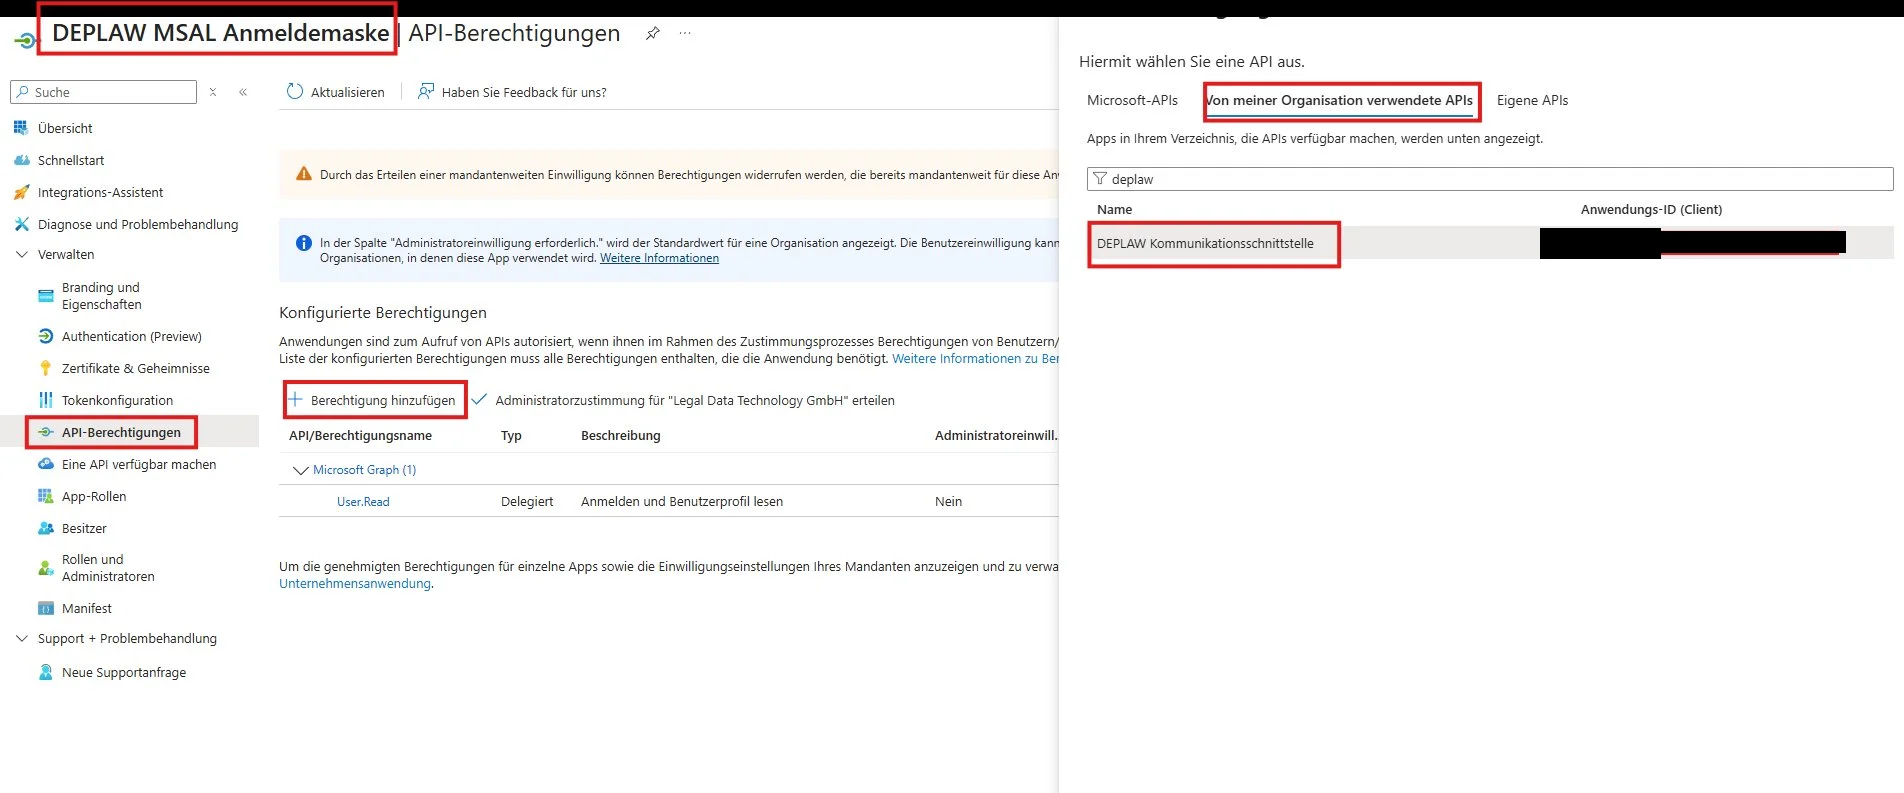
deplaw and select it.Choose type Delegated permissions, select and add the scope deplaw.communications:
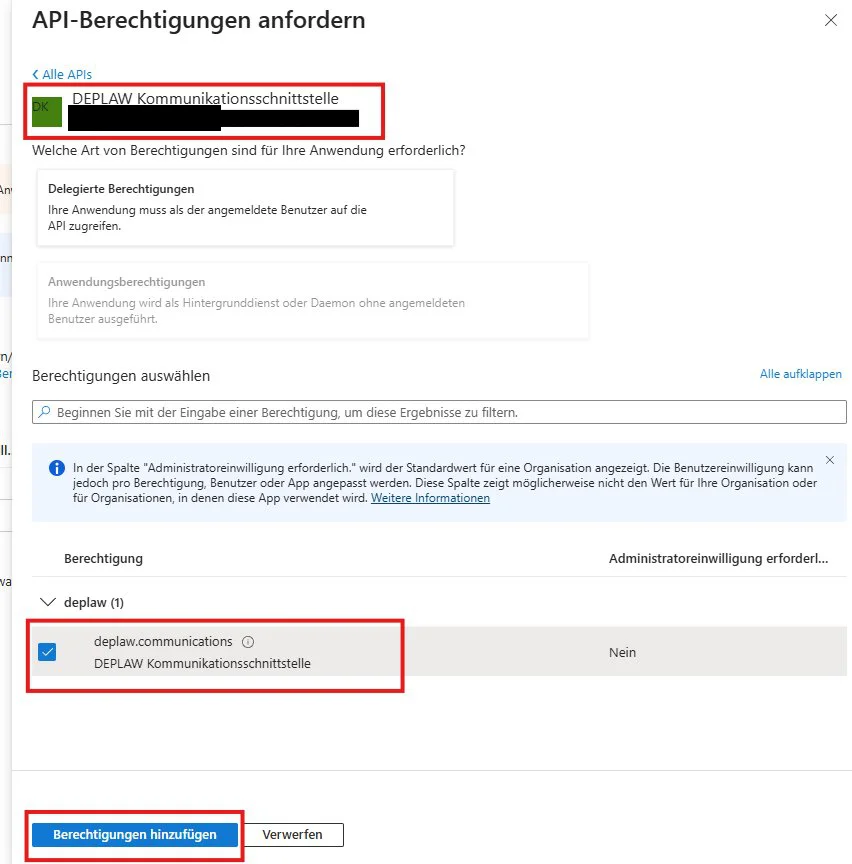
deplaw.communications to the sign-in app.Adding Microsoft Accounts in DEPLAW
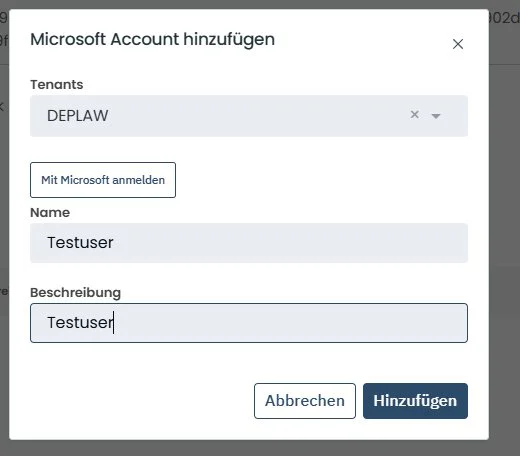
Once the tenant configuration is complete, you can set up as many accounts as you like in DEPLAW – under Settings → Communication → Microsoft Accounts → Microsoft Accounts → Add:
- Select a tenant
Select the tenant created earlier (e.g.
DEPLAW). - Sign in with Microsoft
This button lets the respective user authenticate directly with Microsoft.
- Name / description
Your choice (e.g.
Testuser).
Summary of the values to enter
| DEPLAW wizard field | Source |
|---|---|
| Tenant | https://login.microsoftonline.com/{Directory (tenant) ID}/ |
| Client Id (Frontend) | Application (client) ID of the DEPLAW MSAL Anmeldemaske app |
| OnBehalf API Scope | api://{Client ID}/deplaw.communications of the DEPLAW Kommunikationsschnittstelle app |
| Systemname | your choice |
| Api Client Id | Application (client) ID of the DEPLAW Kommunikationsschnittstelle app |
| Api Client Secret | Client secret of the DEPLAW Kommunikationsschnittstelle app (limited validity) |